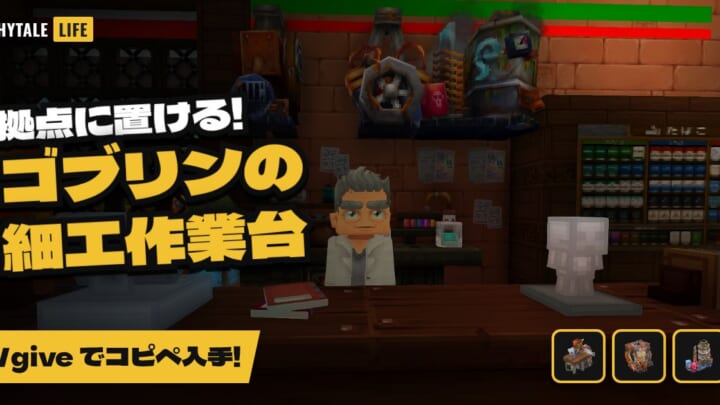
 The Professor
I’m the Professor. Today we’re researching everyone’s favorite: spell runes! There are 7 spell runes, and each can take 2 support runes. I crunched the numbers on every possible combination, all 72 of them, and built a ranking of the strongest. It’s not just about damage, either: I also scored how easy each one actually is to use (handling).
I also explain everything in this article in a video on KeniPoyo’s Hytale channel (Japanese) on YouTube.
Bottom Line: The Professor’s Top 3 Picks
After running all 72 combinations, here are the ones I tried out myself and liked best.
🥇 Ground Slam × Quickening + Thrift
 Ground Slam ×
  Quickening +
  Thrift (Overall 90.3, #1 of 72)
Ground Slam hits hard, but its weakness is a heavy cooldown and mana cost. That’s where Quickening and Thrift come in. The cooldown drops from 5s to 3.5s, and the mana cost from 40 to 24. You can chain those satisfying launches one after another, sending mobs and bosses flying alike. Hands down the strongest combo.
▶ Pick this if you want to go wild
⚔️ Wind Strike × Colossal + Thrift
 Wind Strike ×
  Colossal + Thrift (Overall 75.8)
Colossal is a perfect match for Wind Strike. The wind blade fired from your sword gets bigger and slices through whole lines of enemies at once. It feels like your trusty sword just got stronger, and this was the one that made me feel the most “I’ve gotten stronger!”
▶ Pick this if you fight with a sword
🔥 Fireball × Rebound + Thrift
 Fireball ×
  Rebound + Thrift (Overall 80.2)
The fireball bounces from enemy to enemy, torching several of them with one shot. Watching it go “It’s still bouncing!” is a lot of fun. You can clear out whole mobs from a safe distance, so it’s a beginner-friendly combo.
▶ Pick this if you want to play it safe
One support slot should always be Thrift! That’s the Professor’s way.
I made two big discoveries. 1) Putting Thrift in one support slot is almost always the right call. 2) On raw damage alone Charged Shot is strong too, but its long charge time makes it awkward in real fights. Let me explain in detail.
Best Combo for Each Spell Rune
Want to stick with your favorite spell? Equip these and you can’t go wrong.
| Spell Rune | Recommended Supports | Overall | Handling | Notes |
|---|---|---|---|---|
| Ground Slam |
Quickening + Thrift |
90.3 | ★★★★☆ | Melee area attack. Your go-to when surrounded. You need to get close to enemies |
| Fireball |
Rebound + Thrift |
80.2 | ★★★★★ | Fires instantly with a wide area. An all-rounder, great for beginners |
 Charged Shot Charged Shot |
 Splinter + Thrift Splinter + Thrift |
76.0 | ★★☆☆☆ | A heavy charged shot from long range. You can barely move while charging, so keep your distance |
| Wind Strike |
Colossal + Thrift |
75.8 | ★★★★☆ | A sword user’s best friend. Colossal widens the wind blade so it cuts through whole mobs |
 Enrage Enrage |
Quickening + Thrift |
61.4 | ★★★★★ | Boosts your attacks by 30%. Quickening + Thrift keeps it up at all times |
 Imbue Poison Imbue Poison |
Quickening + Thrift |
57.4 | ★★★★☆ | The more you hit with your weapon, the stronger it gets. Quickening + Thrift keeps the poison going |
 Chain Hook Chain Hook |
Thrift +  Rend Rend |
27.8 | ★★★★☆ | Low damage, but handy for pulling enemies in |
How the Ranking Works
- Each fight lasts 30 seconds. Mana starts full (100) and, per the game data, regenerates 1 point every 0.3 seconds (about 3.3 per second)
- Spells are cast as soon as the cooldown ends. If there isn’t enough mana, you can’t cast
- For Charged Shot, the 2.1 seconds it takes to fully charge is included (the cooldown starts after firing)
- “Boss” = total damage to 1 enemy over 30 seconds, “Mob” = total damage to 3 enemies over 30 seconds. These two give the Damage score (out of 100)
- Handling rates ease of use out of 20 (can you fire instantly, can you use it on the move, is it easy to hit with)
- Overall = Damage × 0.8 + Handling (out of 100). Enrage is calculated assuming a weapon DPS of 20
Why Thrift Is So Strong
Mana regenerates pretty slowly. Over a 30-second fight, almost every combination runs out of mana before the cooldown becomes the limit. So even though Thrift lowers damage by 20%, cutting mana cost by 25% means you get to cast more often, and your total damage ends up higher. All five of the top 5 use Thrift!
Charged Shot’s Weaknesses
On damage alone, Charged Shot is top-tier, but in practice it’s quite quirky. Here’s what I found when I dug into the game data.
| Charge Time | Stage | Damage | Move Speed While Charging |
|---|---|---|---|
| 0s+ | Stage 1 | 12 | 60% (no sprinting) |
| 0.6s+ | Stage 2 | 24 | 40% |
| 1.35s+ | Stage 3 (brief freeze) | 38 | 20% |
| 2.1s+ | Full charge (freeze + icicle splits) | 55 | 8% (nearly standing still) |
- It takes 2.1 seconds to fully charge. You can’t sprint during that time, and by the end you’re almost standing still
- The cooldown starts counting after you fire, so each shot takes 2.1s of charging + the cooldown
- Splinter and Rebound only trigger on a full charge. Fire early and they do nothing
- Against bosses that move around a lot, or when you’re surrounded, there’s no time to charge
That’s why Charged Shot gets the lowest Handling score in this ranking. When you can aim from far away or the target moves slowly, though, it’s still among the very best.
Overall Ranking: Top 10
| Rank | Spell Rune | Support Runes | Overall | Damage | Handling | Boss 1 enemy, 30s |
Mob 3 enemies, 30s |
Mana |
|---|---|---|---|---|---|---|---|---|
| 1 | Ground Slam |
Quickening + Thrift |
90.3 | 95.4 | ★★★★☆ | 240 | 576 | 24.0 |
| 2 | Ground Slam |
Colossal + Thrift |
85.3 | 89.1 | ★★★★☆ | 224 | 538 | 48.0 |
| 3 | Ground Slam |
Thrift + Rend |
82.5 | 85.6 | ★★★★☆ | 220 | 504 | 36.0 |
| 4 | Fireball |
Rebound + Thrift |
80.2 | 75.2 | ★★★★★ | 157 | 539 | 28.1 |
| 5 | Fireball |
Splinter + Thrift |
79.8 | 74.7 | ★★★★★ | 157 | 533 | 28.1 |
| 6 | Ground Slam |
Quickening + Rend |
79.3 | 81.6 | ★★★★☆ | 210 | 480 | 38.4 |
| 7 | Charged Shot |
Splinter + Thrift |
76.0 | 87.5 | ★★☆☆☆ | 220 | 528 | 32.8 |
| 8 | Wind Strike |
Colossal + Thrift |
75.8 | 74.7 | ★★★★☆ | 168 | 504 | 36.0 |
| 9 | Charged Shot |
Splinter + Rebound |
75.5 | 84.4 | ★★☆☆☆ | 165 | 634 | 54.7 |
| 10 | Fireball |
Quickening + Thrift |
74.2 | 67.7 | ★★★★★ | 185 | 370 | 18.0 |
What If We Compare Damage Only?
Here’s the top 5 ranked purely by damage, ignoring handling. Charged Shot climbs way up.
- Ground Slam × Quickening + Thrift (Damage 95.4)
- Ground Slam × Colossal + Thrift (Damage 89.1)
- Charged Shot × Splinter + Thrift (Damage 87.5)
- Ground Slam × Thrift + Rend (Damage 85.6)
- Charged Shot × Splinter + Rebound (Damage 84.4)
Best in Each Category
- Best for bosses: Ground Slam × Quickening + Thrift … 240 damage to a single enemy in 30s
- Best for clearing mobs: Charged Shot × Splinter + Rebound … 634 damage to 3 enemies in 30s. The fully charged shot splits and bounces everywhere (the best if you have room to charge)
- Easiest to use: Fireball × Rebound + Thrift … Fires instantly and is easy to land. Beginners should start here
- Rapid-fire king: Fireball × Quickening + Thrift … One cast every 1.4s for 18.0 mana. For players who just want to overwhelm with volume
Popular but Underwhelming Combos
- Fireball × Colossal + Rebound … Looks flashy, but it costs 60.0 mana. You can only cast it 3 times in 30 seconds. Colossal also slows the projectile, making it harder to hit
- Any combo with Wither … Damage drops by a whopping 30%. It’s a defensive rune that weakens enemy attacks by 15%, so it sits near the bottom of a damage ranking. Think of it as insurance when a boss hits too hard
- Enduring … Longer effect duration, but +60% cooldown. Almost no use outside of Enrage or Imbue Poison
Full Ranking of All 72 Combos
Tap to see them all
| Rank | Spell Rune | Supports | Overall | Damage | Handling | Boss | Mob | Mana |
|---|---|---|---|---|---|---|---|---|
| 1 | Ground Slam | Quickening + Thrift | 90.3 | 95.4 | 14 | 240 | 576 | 24.0 |
| 2 | Ground Slam | Colossal + Thrift | 85.3 | 89.1 | 14 | 224 | 538 | 48.0 |
| 3 | Ground Slam | Thrift + Rend | 82.5 | 85.6 | 14 | 220 | 504 | 36.0 |
| 4 | Fireball | Rebound + Thrift | 80.2 | 75.2 | 20 | 157 | 539 | 28.1 |
| 5 | Fireball | Splinter + Thrift | 79.8 | 74.7 | 20 | 157 | 533 | 28.1 |
| 6 | Ground Slam | Quickening + Rend | 79.3 | 81.6 | 14 | 210 | 480 | 38.4 |
| 7 | Charged Shot | Splinter + Thrift | 76.0 | 87.5 | 6 | 220 | 528 | 32.8 |
| 8 | Wind Strike | Colossal + Thrift | 75.8 | 74.7 | 16 | 168 | 504 | 36.0 |
| 9 | Charged Shot | Splinter + Rebound | 75.5 | 84.4 | 8 | 165 | 634 | 54.7 |
| 10 | Fireball | Quickening + Thrift | 74.2 | 67.7 | 20 | 185 | 370 | 18.0 |
| 11 | Fireball | Thrift + Rend | 74.2 | 67.8 | 20 | 185 | 371 | 27.0 |
| 12 | Wind Strike | Quickening + Thrift | 74.0 | 72.5 | 16 | 198 | 396 | 18.0 |
| 13 | Fireball | Splinter + Rebound | 72.9 | 66.1 | 20 | 112 | 542 | 46.9 |
| 14 | Wind Strike | Thrift + Rend | 72.9 | 71.1 | 16 | 194 | 389 | 27.0 |
| 15 | Fireball | Colossal + Thrift | 72.8 | 69.8 | 17 | 157 | 470 | 36.0 |
| 16 | Wind Strike | Colossal + Quickening | 71.9 | 69.9 | 16 | 157 | 472 | 38.4 |
| 17 | Fireball | Colossal + Rebound | 71.6 | 65.8 | 19 | 118 | 522 | 60.0 |
| 18 | Fireball | Colossal + Quickening | 71.3 | 65.4 | 19 | 147 | 441 | 38.4 |
| 19 | Fireball | Colossal + Splinter | 69.3 | 65.4 | 17 | 118 | 517 | 60.0 |
| 20 | Fireball | Rebound + Rend | 68.5 | 60.6 | 20 | 138 | 404 | 45.0 |
| 21 | Fireball | Splinter + Rend | 68.3 | 60.4 | 20 | 138 | 401 | 45.0 |
| 22 | Fireball | Rebound + Quickening | 68.3 | 60.4 | 20 | 126 | 433 | 30.0 |
| 23 | Fireball | Splinter + Quickening | 68.0 | 60.0 | 20 | 126 | 428 | 30.0 |
| 24 | Fireball | Quickening + Rend | 67.1 | 58.9 | 20 | 161 | 322 | 28.8 |
| 25 | Wind Strike | Quickening + Rend | 65.2 | 61.5 | 16 | 168 | 336 | 28.8 |
| 26 | Charged Shot | Rebound + Thrift | 64.4 | 70.5 | 8 | 176 | 429 | 32.8 |
| 27 | Ground Slam | Colossal + Quickening | 64.0 | 62.5 | 14 | 157 | 378 | 51.2 |
| 28 | Wind Strike | Colossal + Rend | 62.4 | 58.0 | 16 | 137 | 374 | 57.6 |
| 29 | Enrage | Quickening + Thrift | 61.4 | 51.7 | 20 | 180 | 180 | 27.0 |
| 30 | Enrage | Quickening + Enduring | 61.4 | 51.7 | 20 | 180 | 180 | 46.8 |
| 31 | Enrage | Thrift + Enduring | 61.4 | 51.7 | 20 | 180 | 180 | 43.9 |
| 32 | Fireball | Colossal + Rend | 61.0 | 55.0 | 17 | 130 | 354 | 57.6 |
| 33 | Wind Strike | Colossal + Enduring | 60.9 | 56.1 | 16 | 126 | 378 | 62.4 |
| 34 | Charged Shot | Rebound + Rend | 58.6 | 63.2 | 8 | 168 | 358 | 52.5 |
| 35 | Ground Slam | Thrift + Wither | 58.6 | 55.7 | 14 | 140 | 336 | 36.0 |
| 36 | Wind Strike | Thrift + Enduring | 58.2 | 52.7 | 16 | 144 | 288 | 29.3 |
| 37 | Wind Strike | Enduring + Rend | 58.2 | 52.7 | 16 | 144 | 288 | 46.8 |
| 38 | Imbue Poison | Quickening + Thrift | 57.4 | 51.7 | 16 | 180 | 180 | 24.0 |
| 39 | Imbue Poison | Quickening + Enduring | 57.4 | 51.7 | 16 | 180 | 180 | 41.6 |
| 40 | Imbue Poison | Thrift + Enduring | 57.4 | 51.7 | 16 | 180 | 180 | 39.0 |
| 41 | Ground Slam | Colossal + Rend | 56.6 | 53.3 | 14 | 136 | 317 | 76.8 |
| 42 | Charged Shot | Splinter + Rend | 56.2 | 62.8 | 6 | 168 | 353 | 52.5 |
| 43 | Ground Slam | Quickening + Wither | 55.7 | 52.1 | 14 | 131 | 315 | 38.4 |
| 44 | Wind Strike | Quickening + Enduring | 55.5 | 49.4 | 16 | 135 | 270 | 31.2 |
| 45 | Fireball | Rend + Wither | 52.5 | 40.6 | 20 | 111 | 221 | 43.2 |
| 46 | Fireball | Thrift + Wither | 52.2 | 40.3 | 20 | 110 | 220 | 27.0 |
| 47 | Ground Slam | Rend + Wither | 51.3 | 46.6 | 14 | 120 | 274 | 57.6 |
| 48 | Wind Strike | Thrift + Wither | 50.5 | 43.1 | 16 | 118 | 235 | 27.0 |
| 49 | Fireball | Rebound + Wither | 50.0 | 37.5 | 20 | 78 | 270 | 45.0 |
| 50 | Fireball | Splinter + Wither | 49.8 | 37.3 | 20 | 78 | 267 | 45.0 |
| 51 | Wind Strike | Rend + Wither | 49.7 | 42.1 | 16 | 115 | 230 | 43.2 |
| 52 | Charged Shot | Thrift + Rend | 49.4 | 54.3 | 6 | 189 | 189 | 31.5 |
| 53 | Wind Strike | Colossal + Wither | 47.4 | 39.2 | 16 | 88 | 265 | 57.6 |
| 54 | Fireball | Colossal + Wither | 46.3 | 36.6 | 17 | 82 | 247 | 57.6 |
| 55 | Fireball | Quickening + Wither | 45.8 | 32.2 | 20 | 88 | 176 | 28.8 |
| 56 | Charged Shot | Rebound + Wither | 45.1 | 46.4 | 8 | 116 | 282 | 52.5 |
| 57 | Ground Slam | Colossal + Wither | 45.1 | 38.9 | 14 | 98 | 235 | 76.8 |
| 58 | Wind Strike | Quickening + Wither | 43.6 | 34.5 | 16 | 94 | 189 | 28.8 |
| 59 | Charged Shot | Splinter + Wither | 42.8 | 46.0 | 6 | 116 | 277 | 52.5 |
| 60 | Wind Strike | Enduring + Wither | 40.6 | 30.7 | 16 | 84 | 168 | 46.8 |
| 61 | Charged Shot | Rend + Wither | 35.4 | 36.8 | 6 | 128 | 128 | 50.4 |
| 62 | Charged Shot | Thrift + Wither | 34.2 | 35.3 | 6 | 123 | 123 | 31.5 |
| 63 | Chain Hook | Thrift + Rend | 27.8 | 17.3 | 14 | 56 | 71 | 45.0 |
| 64 | Chain Hook | Rebound + Rend | 23.7 | 9.6 | 16 | 29 | 45 | 75.0 |
| 65 | Chain Hook | Splinter + Rend | 21.7 | 9.6 | 14 | 29 | 45 | 75.0 |
| 66 | Chain Hook | Rend + Wither | 20.6 | 8.3 | 14 | 27 | 34 | 72.0 |
| 67 | Chain Hook | Rebound + Thrift | 20.4 | 5.5 | 16 | 10 | 43 | 46.9 |
| 68 | Chain Hook | Splinter + Rebound | 19.2 | 4.0 | 16 | 6 | 35 | 78.1 |
| 69 | Chain Hook | Splinter + Thrift | 18.3 | 5.4 | 14 | 10 | 42 | 46.9 |
| 70 | Chain Hook | Rebound + Wither | 17.8 | 2.3 | 16 | 4 | 19 | 75.0 |
| 71 | Chain Hook | Thrift + Wither | 16.4 | 3.0 | 14 | 7 | 20 | 45.0 |
| 72 | Chain Hook | Splinter + Wither | 15.8 | 2.3 | 14 | 4 | 18 | 75.0 |
The Professor’s Summary
- When in doubt, go with Ground Slam + Quickening + Thrift. If you can get close, it’s strong against both bosses and mobs
- If you prefer to fight from a distance, go with Fireball + Rebound + Thrift. It fires instantly and handles mobs well
- Charged Shot is only for situations where you have time to charge. With Splinter + Thrift it wipes out mobs
- It’s fine to lock one support slot to Thrift
These numbers were calculated from the game data (Pre-release 7.5). Results will vary if you raise your max mana with armor, or depending on your playstyle. For detailed stats on each rune, check out the Rune Database.