I’m the Professor. This is a Beginner’s Guide for anyone about to start Hytale, or who just started.
Hytale has no tutorial. You get dropped straight into a huge world, so it’s easy to wonder, “What am I supposed to do?” On this page, I’ve laid out everything a beginner wants to know, step by step, from buying the game to multiplayer, your first steps, and handy commands. Be sure to check out KeniPoyo’s videos (in Japanese) along the way, too.
📖 Contents
- What kind of game is Hytale?
- How to buy & edition differences
- Recommended settings to change first
- What to do first when you start
- Workbench priorities (by playstyle)
- Getting around Zone 1
- Ore locations & gear upgrade path
- How to play multiplayer
- Handy commands to know
- Early goals: Teleporters or the Goblin Dungeon
- Decorate your home (Entity Tool)
- What to read next
What Kind of Game Is Hytale?
Hytale is a block-building sandbox RPG developed by Hypixel Studios. It resembles Minecraft, but it leans heavily into RPG elements (dungeons, bosses, rune magic and more), and you can even enjoy mod creation and server hosting using the in-game tools.
- In January 2026, the PC early access version launched, and updates are still coming out almost every week (Update news)
- The game has no Japanese language option yet. You can look up items and mobs in our Item Database and Mob Database.
- A massive update is scheduled for October 12, 2026: Chapter 1 (the Goblin chapter)
How to Buy & Edition Differences
▶ Edition differences and how to upgrade, explained in this video (in Japanese)!
There Are 3 Editions
The actual gameplay is the same in all of them. The only difference is the cosmetic rewards, like costumes and capes, for your avatar.
| Edition | Price (approx.) | Rewards |
|---|---|---|
| Standard | $19.99 | 4 basic costumes |
| Supporter | $34.99 | Standard rewards + 4 more outfits, a cape, and more |
| Cursebreaker | $69.99 | Standard and Supporter rewards + 9 more costumes and a fancy cape |
More edition rewards are planned. Some may end up being available only during early access.
*Prices are approximate, in US dollars. Check the official store when you buy.
How to Buy for the First Time
- Open the official store (store.hytale.com) and choose an edition
- On the payment screen, find the “Creator Code” field on the left side and enter KeniPoyo (capital K and P)
- Make sure the code is entered, then fill in your name, postal code and card details and buy
- Download the launcher, log in, and you’re ready to play
How to Upgrade Later
- Launch Hytale and open the “Shop” on the far right of the home screen
- Choose the edition you want to upgrade to
- A browser opens asking, “Upgrade with this account?” — confirm it
- On the payment screen, before entering your card details, type KeniPoyo in the creator code field
- Once the purchase is done, restart the game. The previously locked cosmetics will now be available on the avatar selection screen
💡 A creator code is not a discount, and the price stays the same. Part of what you pay goes to support KeniPoyo’s work. If you use it, we can keep this site and the videos going even longer!
Recommended Settings to Change First
▶ Settings you’ll regret not knowing about, in this video (in Japanese)!
These are the only spots in the settings menu you really need to touch.
| Tab | Setting | Recommendation |
|---|---|---|
| General | Field of View | Up to you. Wider makes it easier to see around you; narrower feels more immersive |
| General | Enemy health bars & damage numbers | Turn both ON. Combat becomes much easier to read |
| General | Block Placement Preview | ON. Shows a preview before you place a block, so you’ll misplace fewer blocks |
| Gameplay | Auto Step Up / Crouch Auto Step Down | Step Up ON, Crouch Auto Step Down OFF (so you don’t fall off blocks while crouching) |
| Gameplay | Arachnophobia / Ophidiophobia | Turn ON if you dislike spiders or snakes. It swaps their appearance for a different shape |
| Gameplay | Pickup Location | Whether picked-up items go to your hotbar or inventory. Your choice |
| Gameplay | Camera shake & sprint FOV | Turn them down if you get motion sick easily |
| Video | VSync / Unlimited FPS / Max FPS | VSync ON, Unlimited FPS OFF, and set Max FPS to your monitor’s refresh rate (Hz) |
| Video | View Distance | Around 300 is a good balance. Go higher on a powerful PC |
| Video | Render Scale | 80–100 |
| Video | Overall graphics | Medium. Shadows and particles are big performance hogs, so keep them low |
You can switch between first- and third-person at any time with the V key.
Controllers Work Too (with Gyro Support)
Hytale supports controllers. In the settings you can change button layout, vibration, sensitivity and Y-axis inversion (details).
It also supports gyro aiming. Tilting the controller moves the camera, so aiming bows and guns feels intuitive. You can toggle it and adjust sensitivity under “Gamepad” in the settings (details). Great for anyone who wants to kick back on the couch.
What to Do First When You Start
▶ Not sure what to do first? Early-game progression in this video (in Japanese)!
1. Visit the Forgotten Temple
Press M to open the map and look for the swirl icon. That’s the Forgotten Temple. Head there early.
Visiting the temple unlocks Memories (a kind of adventure log). You record the enemies and creatures you meet, and once you’ve collected enough, you turn them in at the temple for rewards that help your adventure. Collecting Memories also increases how many Teleporters you can place.
2. Make Basic Tools and Workbenches
- Gather wood and stone, then craft a
 Workbench from the menu
 - Use the Workbench to build a
 Furnace and a
  Tanning Rack (these let you make ingots and leather. You’ll use them constantly, so be sure to build them)
 - Make a pickaxe, axe and weapon, then grab a torch and head underground to mine copper
3. Pick Your Playstyle
Hytale gives you total freedom, but wandering aimlessly can slow you down. Will you be an adventurer fighting on the front lines, an architect perfecting your base, a settler handling food and daily life, or a greedy jack-of-all-trades? Even a rough decision tells you which workbenches to build first.
Workbench Priorities (by Playstyle)
| Playstyle | Workbenches to build first | Notes |
|---|---|---|
| ⚔ Adventurer |  Armorer’s Workbench Armorer’s Workbench Blacksmith’s Anvil Blacksmith’s Anvil |
Take on dangerous areas with strong weapons and armor. KeniPoyo recommends dual daggers and the crossbow, but what matters most is a weapon that suits you |
| 🏠 Architect |  Builder’s Workbench Builder’s Workbench Furniture Workbench Furniture Workbench |
Turn wood into home-building materials. The Furniture Workbench eats a lot of resources, so be careful. Early on, simple gear from the menu plus chest loot is plenty for fighting |
| 🌾 Settler (slow life) |  Farmer’s Workbench Farmer’s Workbench Chef’s Stove Chef’s Stove |
Raise crops and livestock. Get Salt from the Fishing Trap made at the Farmer’s Workbench, and use cooking to keep your adventures steady |
Once you upgrade a workbench’s tier, three more workbenches become available.
 Salvager’s Workbench: Feed it unwanted weapons, armor or wood and it breaks them back down into materials. Super handy
 Arcanist’s Workbench: It’s tough to build, but it lets you craft Teleporters. Very handy to get early
 Alchemist’s Workbench: Makes potions. You can now even do potion farming
You can see every recipe for each workbench on our workbenches page.
Getting Around Zone 1
▶ Our full Zone 1 walkthrough video (in Japanese) is here!
Zone 1, where you first spawn, is a surprisingly deep area. It’s a waste to rush through it just because it’s the early game.
Biome Features
| Biome | Features |
|---|---|
| Plains (main) | The basic area, a mix of grassland and forest. Watch out: packs of Black Wolves attack even in daytime. At night, enemies that drop Essence of the Void appear too. Lots of animals like cows, pigs, sheep, chickens and horses |
| Blue Forest (Azure) | An area where both the water and the forest are blue. Azure trees grow here, and Azure Kelp, a Teleporter material, grows along the water |
| Autumn Forest | A beautiful area with fall-colored leaves. Grizzly Bears live here, so run if one spots you. Praetorians also respawn in some spots |
| Mountains | A high-altitude area with Goats. Ore can sometimes generate in the blocks up high |
Praetorians can drop Thorium and Cobalt Ingots, Ancient Steel armor, and even spellbooks when defeated. You can get high-tier materials without leaving Zone 1, so when you find one, I recommend you mark it on your map and defeat it regularly.
7 Types of Wood in Zone 1
In the plains you’ll find Oak, Beech and Ash; near rivers, Birch; in the forest, Aspen; in the Autumn Forest, Maple; and in the Blue Forest, Azure. For details, see our wood locations guide.
Underground & Chests
- Caves come in 3 tiers. The deeper you go, the more dangerous, and the more rewarding. The fiery golem deep down (
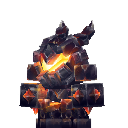 Firesteel Golem) always drops Iron Ingots
 - Chests also come in Tiers 1–4. The higher the tier, the better the loot: copper and iron weapons and armor, healing potions, ingots and more
Stop by a Kweebec Village
There are Kweebec villages in the forest. The crops in their fields can also be used to upgrade the Farmer’s Workbench tier. Merchants accept Essence of Life as currency and sell things like pie recipes.
Ore Locations & Gear Upgrade Path
▶ Our complete ore location video (in Japanese) is here!
The Hytale map is divided into zones, and each zone has different ores. The ore you want decides where you need to go.
| Zone | Main ores |
|---|---|
| Zone 1 (spawn) |  Copper Ore Copper OreDeep areas also have  Iron Ore too Iron Ore too |
| Zone 2 (southern desert) |  Thorium Ore Thorium Ore |
| Zone 3 (northern tundra) |  Cobalt Ore Cobalt Ore |
| Zone 4 (volcanic region) |  Adamantite Ore (top-tier material) Adamantite Ore (top-tier material) |
Even in Zone 1, you can get iron if you dig deep enough underground. Gear gets stronger in this order: Copper → Iron → Thorium → Cobalt → Adamantite. Adamantite can only be mined with a Thorium pickaxe or better, so upgrade your gear step by step. For exact locations, see our ore locations guide; for the best gear, see the weapon rankings and armor rankings.
How to Play Multiplayer
There are three main ways to play with friends.
1. Invite Friends to Your World (Easiest)
Host (the one inviting)
- Enter your world
- Press ESC and open “Online Play”
- Turn ON “Allow Other Players to Join” (set a password if needed)
- Press Save and your share code appears. Copy it with “Copy to Clipboard” and send it to your friends
Joining player
- Open “Servers” from the main menu
- Click “Join via Code” and paste the share code
- Enter the password if there is one, then click Connect
⚠ The share code contains the host’s IP address and expires after a while. Send a new code each time you play, and only to friends you trust. The world is only available while the host is online.
If you can’t connect, try having a different friend host, or use one of the server options below (it may not work in setups like two routers chained together).
2. Join Public Servers
Through the Server Discovery screen added in Update 5, you can browse and join public servers. You can search and add favorites, too. The in-game friends feature also works, so you can team up with people you get along with.
3. Host Your Own Server (Advanced)
With a dedicated server, you can have a world that’s playable 24/7 even without a host online. Just give your friends the server address so they can join.
- Match the server and game versions (pre-release and release versions generally can’t play together)
- To keep strangers out, I recommend using a whitelist (a list of who’s allowed to join)
Voice chat is available too, so you can talk with nearby teammates as you adventure.
Handy Commands to Know
▶ How to use commands for beginners, in this video (in Japanese)!
Press / (slash) on your keyboard to open the command input. First, use /op self to get operator permissions (type it again to go back to a regular player). While you’re OP, press the O key to toggle Creative Mode.
| Command | What it does |
|---|---|
/op self |
Grant or remove operator permissions (lets you use commands) |
/time noon / /time night |
Set it to day or night (numbers work too) |
/give ItemID |
Get an item directly. Example: /give Weapon_Sword_Iron( Iron Sword) Iron Sword) |
/tp top |
Return to the surface when you’re lost underground |
/tp home |
Return to your bed |
/spawn |
Return to the spawn point |
/spawn set / /spawn default |
Set your current location as the spawn point / reset it |
/warp list |
List your Teleporters |
/locate |
Find and teleport to a biome or zone (details) |
/kit iron |
Get a full set of iron gear instantly (details) |
/help |
Show the list of commands |
You can see an item’s ID by looking at it in Creative Mode. The database pages on this site also show IDs with a copy button, so feel free to use them.
Early Goals: Teleporters or the Goblin Dungeon
Once you’ve got the hang of things, I recommend aiming for one of these two next.
Build a Teleporter
Place two and you can zip between them instantly — your very own magic door. Link your base, mine and exploration spots, and adventuring gets a whole lot easier.
👉 How to make a Teleporter (where to find materials & the fastest route)
Explore the Goblin Dungeon
If you’re confident in your skills, take on the Goblin Dungeon, where goblins lie in wait. At the very end, the goblin boss 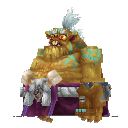 Goblin Feastmaster awaits.
👉 Chapter 1 Special (the Goblin chapter) / Complete Chapter 1 guide
After Chapter 1, It’s Rune Magic, Right?
Once Chapter 1 arrives, you can fight with spell runes. Spam fireballs, perfect your base, or enjoy a slow life of farming — it’s all good. How you play is up to you!
👉 The rune magic you should learn first!
Decorate Your Home (Entity Tool)
▶ Decking out your house with the Entity Tool, in this video (in Japanese)!
It’s a little tricky, but once you learn it, building becomes way more fun: the Entity Tool. It lets you place blocks and objects you normally can’t, at an angle or floating in the air.
- Hang weapons on the wall, tilt small items slightly, and so on — a little bit of clutter looks stylish
- When in doubt, lining up some plants alone gives a place the right vibe
- It works wonders whenever a room feels a bit plain
*Decorating heavily with the Entity Tool can make your world laggy or hard to open. Back up any world that matters to you.
What to Read Next
- The rune magic you should learn first! All 7 compared
- Rune combo rankings
- Chapter 1 Special (the Goblin chapter)
- How to build a mushroom farm
- All Hytale guides
- Update news
Hytale is a game of freedom. You don’t have to follow this page exactly. Start by visiting the temple, build some workbenches, and head off on an adventure wherever your curiosity takes you. If you get stuck, just come back to this page.
This information is current as of October 2026. Updates may change things.